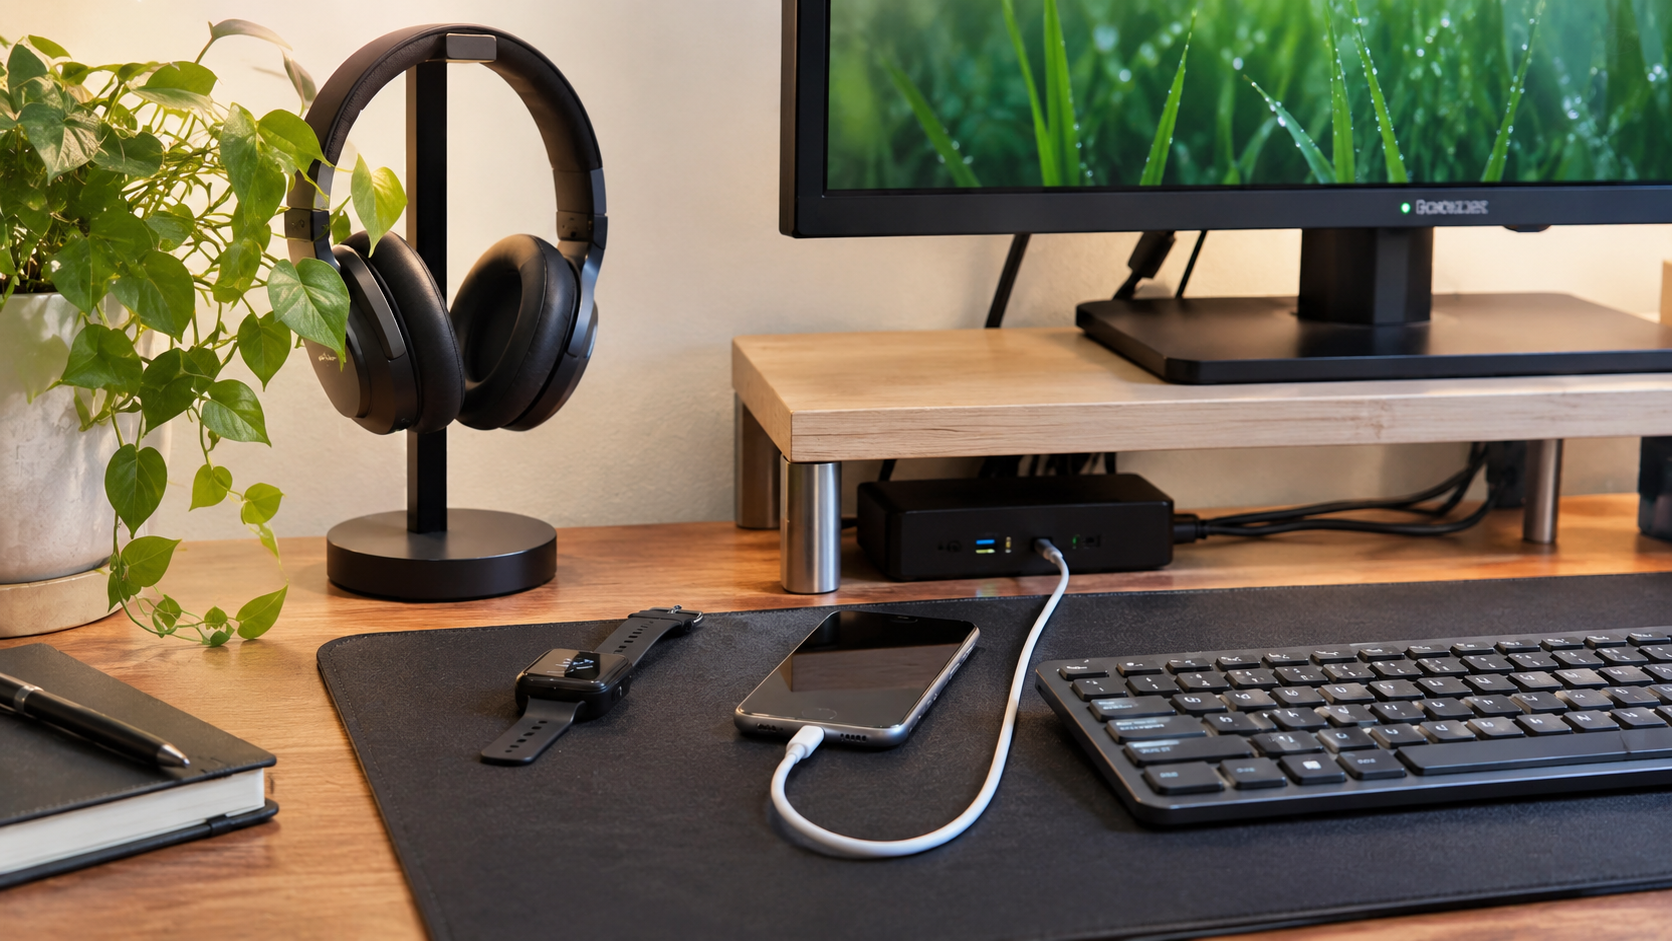





A new year often starts with plans for a more comfortable workspace. Yet even an organized home office can have a familiar problem: charging cables falling behind the desk, tangled monitor wires, and a power strip buried beneath a pile of adapters.
The good news is that organizing cables in a home office doesn't require drilling holes, replacing furniture, or buying an expensive desk setup. A few reusable accessories and a better arrangement can make a noticeable difference in about 30 minutes.
The key is to organize cables around how the desk is actually used. A laptop that gets disconnected every evening needs a different arrangement from a desktop computer that stays in place. The same applies to standing desks, shared workspaces, and dual-monitor setups.
With January 2027 approaching, this is a practical time to deal with cables left over from holiday electronics purchases and prepare for a fresh working routine. The most effective fixes are inexpensive, reversible, and easy to maintain when another device joins the desk.
How to Organize Cables in a Home Office in Just 30 Minutes
The fastest way to organize cables in a home office is to separate essential connections, choose a safe location for power equipment, and route everything else along the back or underside of the desk. Reusable cable ties and clips hold the arrangement together without making future changes difficult.
For a typical desk with one computer, one or two monitors, and a handful of accessories, the initial cleanup can fit into a 30-minute session. More complicated gaming setups, multiple docking stations, or desks requiring hardware installation may take longer.
The following plan provides a realistic starting point.
| Time | Task | Expected result |
| 0–5 minutes | Identify and separate cables | Unused cords removed, active connections identified |
| 5–10 minutes | Plan the cable routes | Power, display, and charging paths established |
| 10–18 minutes | Position power equipment and route fixed cables | Fewer cords hanging behind the desk |
| 18–25 minutes | Add reusable ties and cable clips | Loose cables secured without restricting movement |
| 25–30 minutes | Reconnect, test, and label | Working equipment and a maintainable arrangement |
This timetable assumes that the necessary supplies are available and that no drilling or electrical repairs are needed. A safe, functional arrangement matters more than finishing in exactly 30 minutes.
Before disconnecting anything, save open work, shut down equipment where appropriate, and photograph the current connections. That simple photo can help identify the correct ports if several cables look identical.
What Do You Need to Organize Home Office Cables?
Most home office cable organization projects require only reusable cable ties, a few clips, and simple labels. An under-desk tray or cable sleeve can help with larger setups, but neither is essential for getting started.
The easiest approach is to use existing supplies before purchasing anything new.
5 Cable Management Tools That Are Actually Useful
A small collection of accessories can solve most everyday cable clutter. Each item serves a different purpose, so buying every available organizer is rarely necessary.
Consider these five options:
- Reusable Hook-and-Loop Ties. Keep related cables together while allowing easy changes when devices are replaced.
- Adhesive Cable Clips. Hold lightweight charging and data cables along suitable desk edges or other approved surfaces.
- Cable Labels. Identify monitor, laptop, charger, and networking connections without tracing every cord.
- Under-Desk Cable Tray. Provides an organized space for compatible cables and accessories while freeing the desktop.
- Cable Sleeve. Groups several cables traveling together into one manageable run.
Hook-and-loop ties are particularly useful because they can be opened repeatedly. They also make it easier to remove one cable without cutting through a tightly secured bundle.
Adhesive clips are convenient for a no-drill setup, but their holding strength depends on the surface, temperature, and weight of the cables. Heavy adapters and power equipment need properly rated support rather than ordinary lightweight adhesive clips.
Can You Organize Desk Cables Without Buying Anything?
Yes. A no-cost cable cleanup can improve an ordinary desk by removing unused cords, repositioning equipment, and reusing suitable organizers already available at home.
Small paper labels or masking tape can identify cables, while existing reusable ties can keep low-voltage data cables together. Even moving a laptop charger closer to its usual connection point may eliminate a long loose cable across the desk.
Avoid improvising electrical fixtures with metal staples, nails, or unsuitable tape. Cable organization should not damage insulation or create pressure on a power cord.
The most important improvement often comes from removing unnecessary cables rather than purchasing new accessories to hide them.
Step 1. Sort Your Home Office Cables Before Hiding Them
Start organizing home office cables by identifying what each cord connects to and whether it is still needed. Hiding everything immediately can create a neater-looking desk while making the underlying tangle harder to maintain.
A typical home office contains three functional cable groups: power, data and display connections, and frequently handled charging cables.
Separate them before choosing their final routes.
Which Desk Cables Should Stay Connected?
Cables used by permanent equipment should generally remain in a fixed, protected route. Cables used for portable devices need to remain reachable.
A simple arrangement can be divided into the following groups:
- Permanent power connections: Monitor adapters, desktop computer power, and other devices that rarely move.
- Display and data connections: HDMI, DisplayPort, USB-C, Ethernet, and peripheral connections.
- Frequently used charging cables: Phone, headphones, tablet, and laptop charging leads.
- Unused or spare cables: Old accessories, duplicate cords, and cables belonging to equipment no longer connected.
Keep spare cables in a separate labeled container rather than leaving them behind the desk. If a cable has no identifiable purpose, check the equipment before throwing it away.
This sorting process makes the next steps easier because permanent equipment can stay out of sight while frequently used connections remain accessible.
Should Power Cables Be Separated From Data Cables?
Separating mains power cables from signal cables where practical makes a setup easier to inspect and maintain. It can also reduce the possibility of interference in certain sensitive audio or data installations.
Modern shielded cables are generally designed to operate near other electrical equipment, so complete separation is not always necessary. There is no need to create elaborate routes for every ordinary USB accessory.
Avoid tightly compressing multiple power cords or wrapping them around adapters. Keep connections accessible and follow the cable and equipment manufacturers' installation requirements.
Step 2. Choose One Main Route for Cables Behind the Desk
The most effective way to organize cables behind a home office desk is to decide where each connection should travel before attaching any clips. A clear route prevents cords from crossing the workspace or hanging where feet and chair wheels can catch them.
For many fixed desks, the back edge and underside provide useful cable-management locations. The correct arrangement depends on desk construction, available clearance, and the equipment being connected.
How to Hide Cables Behind a Desk Without Drilling
No-drill cable management works best with removable clips, hook-and-loop ties, and clamp-on accessories designed for the desk. These options are particularly useful in rented apartments or workspaces where permanent modifications are undesirable.
A practical routing sequence is:
- Identify the power source. Check that the existing wall outlet and power arrangement safely support the connected equipment.
- Choose the equipment positions. Place the monitor, laptop, dock, and accessories where they will normally be used.
- Map the cable paths. Follow the rear desk edge or another protected route without creating sharp bends.
- Position suitable organizers. Use approved clips, reusable ties, or a clamp-on tray where the desk structure allows.
- Leave access to connections. Make sure plugs, switches, and adapters can still be reached when needed.
The result should allow ordinary cleaning and equipment changes without dismantling the entire setup.
Do not route ordinary electrical cords through holes in walls, beneath carpets, or through doorways as a substitute for permanent wiring. Hiding a cable does not make an unsafe installation acceptable.
Should You Use a Cable Tray or Cable Clips?
An under-desk cable tray is useful when several compatible cables and small accessories need an organized location. Cable clips are better for guiding individual leads along an existing surface.
A tray can make a workstation look cleaner from the front, but it must not become an enclosed compartment where power adapters overheat. Any mounted electrical equipment must be installed according to its own instructions.
For a small laptop desk, clips and reusable ties may be enough. A larger dual-monitor setup can benefit from a tray, provided there is sufficient clearance and an appropriate mounting arrangement.
Step 3. Organize the Power Strip Without Creating a Safety Hazard
Power strip placement is one of the most important parts of home office cable organization. A strip lying among chair wheels, dust, and tangled cords is inconvenient, but moving it into a tightly enclosed box can create other problems.
The safest arrangement uses a properly rated power strip in a suitable, accessible location. It must remain ventilated and be installed only in ways permitted by the manufacturer.
Is It Safe to Mount a Power Strip Under a Desk?
A power strip may be mounted under a desk if its manufacturer permits that installation and the mounting hardware is suitable. Some products have integrated mounting slots or brackets, while others are intended to remain on an accessible surface.
Before mounting one, check its instructions, weight, orientation requirements, and available clearance.
An appropriate installation should allow:
- Access to the power switch and overload-reset control, if present.
- Adequate ventilation around the strip and connected power adapters.
- Secure support without tension on the plug or cord.
- Clearance from moving desk parts, chair mechanisms, and footrests.
- Safe access for unplugging equipment when necessary.
Do not drill into a power strip housing or modify its enclosure to create mounting points. If its approved installation method is unclear, leave it in a suitable accessible position rather than improvising a mount.
Can You Put a Power Strip Inside a Cable Management Box?
A power strip should not be placed inside a cable box unless the product's instructions permit the arrangement and adequate ventilation is maintained. Enclosed boxes can trap heat, particularly when several power adapters operate continuously.
Large laptop chargers and other power bricks may become warm during normal use. They should not be stacked under fabric, packed tightly together, or covered with papers.
The goal is to organize home office cables without compromising electrical safety.
6 Electrical Safety Rules for Desk Cable Management
Before securing power cables, inspect the equipment and check that the power arrangement is appropriate for its intended use. Small workstations can contain several electrical devices even when the visible cable clutter seems minor.
Follow these precautions:
- Never Daisy-Chain Power Strips. Do not plug one power strip into another or use extension cords to build a permanent outlet system.
- Do Not Overload Outlets. Check the electrical ratings of the power strip and connected equipment.
- Keep Cords Away From Heat. Leave adequate clearance around heaters, radiators, and warm power adapters.
- Avoid Pinched Cables. Keep power cords away from sharp desk edges, moving furniture, and chair wheels.
- Replace Damaged Cords. Stop using cables with frayed insulation, exposed wiring, damaged plugs, or unusual overheating.
- Keep Electrical Equipment Accessible. Do not conceal plugs or adapters where a problem cannot be noticed or addressed.
These rules apply regardless of whether the workstation is in the United States, United Kingdom, or European Union, although local electrical standards and plug requirements differ.
A surge protector does not increase the safe electrical capacity of a wall outlet. If the workspace needs more permanent outlets, a qualified electrician is a safer solution than relying on additional extension cords.
Step 4. Use Reusable Cable Ties Without Making Everything Too Tight
Reusable ties are an inexpensive way to organize cables in a home office, especially when several cables follow the same route. They reduce loose loops and keep connections easier to identify without permanently fastening the setup.
The best arrangement is not necessarily the tightest. Cables need sufficient freedom to move, avoid sharp bends, and reach their ports without pulling.
Are Velcro Ties Better Than Plastic Zip Ties?
Hook-and-loop ties are generally more convenient for home office cable management because they can be reopened without tools. Plastic zip ties are less suitable for a workstation that changes regularly and can apply excessive pressure when tightened.
Use reusable ties for appropriate groups of data and peripheral cables. Keep AC power cords arranged in a way that preserves ventilation and avoids tight coils or compressed bundles.
For example, HDMI and USB data cables running toward the same monitor may be routed together when their manufacturers permit it. A laptop charging cable that is repeatedly unplugged should remain separate and easy to reach.
How Much Slack Should You Leave in Desk Cables?
Leave enough slack for normal equipment movement without creating large loops that can catch on furniture. The correct amount depends on the laptop position, monitor arm movement, or height adjustment of the desk.
A few inches may be sufficient for a fixed device, but a movable monitor arm can require considerably more. Test the entire range of movement rather than guessing.
Never pull a cable tight between a desk-mounted device and a fixed wall outlet. Connector strain can cause intermittent disconnections, damaged ports, or unsafe cable wear.
Step 5. Keep Daily Charging Cables Within Reach
Daily charging cables should be organized differently from permanent power connections. A phone charger that is needed several times per day should not disappear into an inaccessible tray.
Instead, establish one small charging location near the edge of the desk. This helps keep cables accessible without leaving them spread across the working surface.
How to Stop Charging Cables From Falling Behind the Desk
A suitable cable clip positioned near the usual charging location can prevent a disconnected charging lead from dropping behind furniture. It should hold the cable without crushing it or pulling on its connector.
For example, a phone cable can remain near the side of the monitor while its unused length follows a protected route behind the desk. A headset charger can use another accessible clip near its storage location.
The arrangement should account for daily habits. Someone who charges a phone on the right side of the desk gains little from a cable neatly attached to the opposite side.
Can One USB-C Dock Reduce Home Office Cable Clutter?
A compatible USB-C or Thunderbolt docking station can reduce the number of cables connected directly to a laptop. It allows supported monitors, accessories, networking equipment, and power connections to remain attached to the dock.
However, the dock itself still requires cables, and compatibility varies between computers. USB-C ports do not all provide the same charging, video, or data capabilities.
A dock is most useful when the laptop is connected and disconnected regularly. For a fixed desktop computer, organizing existing connections may be more economical than adding another device.
The same issue matters when choosing between a permanent mini desktop and a portable computer. The comparison of mini PC vs. laptop in 2027 explains how connectivity, peripherals, and additional equipment influence the complete home office setup.
9 Home Office Cable Management Fixes Compared
The best solution depends on where the cables are located and how often they need to move. Some organizers work well for fixed workstations, while others are more suitable for renters or adjustable desks.
This comparison helps identify which accessories are worth using and which may be unnecessary.
| Cable management solution | Best for | Main limitation |
| Reusable cable ties | Small cable groups | Do not solve poor routing by themselves |
| Adhesive cable clips | Lightweight cables along desk edges | Adhesive strength and surface compatibility vary |
| Clamp-on cable tray | Fixed desks with several connections | Requires compatible desk shape and clearance |
| Cable sleeve | Cables traveling together | Individual cables are harder to remove |
| Under-desk mounting brackets | Approved power equipment and accessories | Mounting compatibility must be verified |
| Cable labels | Identifying frequently changed connections | Do not physically reduce clutter |
| Cable management spine | Height-adjustable desks | Must accommodate the full movement range |
| USB-C docking station | Laptop workstations | Adds cost and compatibility requirements |
| Surface cable cover | Suitable exposed cable routes | Must be rated for its intended use and location |
Not every solution belongs in the same desk setup. A few reusable ties and clips can be enough for a compact workspace, while a standing desk may require more specialized routing.
The simplest system that safely supports everyday use is usually easier to maintain than an elaborate installation with too many organizers.
How to Organize Cables on a Standing Desk
Standing desks require cable management that accommodates movement. A cable arrangement that looks neat while sitting can become stretched or disconnected when the desk rises.
The safest approach is to plan every cable route around the desk's full height range and keep cables away from moving mechanisms.
Where Should Cables Go on a Height-Adjustable Desk?
Cables should follow protected routes that allow the work surface to move freely. Devices traveling with the desktop can use appropriately supported routes, while cords connecting to fixed outlets require sufficient slack or a suitable cable-management system.
A cable spine or manufacturer-compatible management accessory can help guide the moving section.
Before securing the final arrangement, inspect:
- The distance between the desk and wall outlet.
- The desk's lowest and highest positions.
- Monitor arm and keyboard-tray movement.
- Clearance around lifting columns and moving mechanisms.
- The position of the power strip and its mounting requirements.
- The possibility of loose cables catching on nearby furniture.
After organizing the cables, raise and lower the desk slowly through its full travel range. Stop immediately if a cord becomes stretched, pinched, or caught.
A standing desk cable setup is not complete until it has been tested at both maximum and minimum height.
Can Cable Clips Work on a Standing Desk?
Cable clips can work on suitable sections of a standing desk, but they must not hold a moving cable in a position that creates tension. Their placement should follow the desk manufacturer's recommendations and the cable's required movement path.
Clips are useful for lightweight peripheral cables on the desktop. The changing distance between the desktop and wall outlet requires more careful routing.
Do not attach cables to lifting mechanisms or place them where moving parts can damage the insulation.
How to Organize Cables With Two Monitors
Dual-monitor workstations often have more visible cables because each display may require power and a separate video connection. The easiest way to simplify the setup is to choose the shortest practical routing paths and keep connections associated with each monitor identifiable.
Start with the monitor positions before securing the cables. Adjusting the screens afterward may require additional slack or a different route.
Should Monitor Cables Be Hidden Behind the Stand?
Monitor cables can often be routed behind the stand or through a built-in cable management channel. Many monitor arms also have designated guides for video and power connections.
Use these features only as intended, and leave enough freedom for height, tilt, and rotation adjustments.
If the monitors will be repositioned frequently, avoid tightly securing their cables to one fixed point.
For readers planning a larger workspace update, the article on second monitor mistakes to avoid covers desk dimensions, video connections, mounting options, and other practical details that affect a dual-screen arrangement.
Is One-Cable Monitor Connectivity Worth It?
A compatible USB-C monitor can simplify a laptop workspace by carrying video and, on supported models, data and charging through one connection. This can reduce the number of leads handled during daily docking.
However, the computer, cable, and monitor must support the required functions. A USB-C connector alone does not guarantee video output or sufficient charging power.
If existing monitors work reliably, there is usually no reason to replace them solely for cleaner cable management. Better routing and a suitable dock may achieve the desired result at lower cost.
Home Office Cable Organization for Small Desks and Renters
A small desk can be organized effectively without installing permanent fixtures. In fact, compact workspaces often benefit most from reducing the number of accessories rather than adding large organizers.
For rented homes, reversible methods also reduce the risk of damaging walls or furniture.
How to Organize Cables Without Drilling or Damaging Furniture
Choose clips, ties, and clamp-on accessories that suit the desk's materials and construction. Always check adhesive instructions before attaching anything to painted, laminated, or delicate surfaces.
Removable adhesives are not guaranteed to release cleanly from every finish. Test an inconspicuous area where practical, and avoid applying them to damaged veneer or unstable paint.
A compact setup can be arranged with a few simple changes:
- Move Infrequently Used Accessories Off the Desktop. Store disconnected cables and spare adapters separately.
- Choose One Accessible Charging Point. Keep commonly used phone and headset cables in a predictable location.
- Use the Rear Desk Edge. Route appropriate lightweight data cables away from the main working surface.
- Select Reusable Organizers. Prefer methods that can be opened or repositioned when the workspace changes.
- Keep Power Equipment Properly Supported. Do not suspend heavy chargers from clips intended for lightweight cables.
This approach works particularly well in apartments, shared bedrooms, and temporary home offices.
How to Hide Cables on a Desk Against a Wall
A desk placed against a wall can hide many connections naturally, but cables still need room to bend without being crushed. Leave appropriate clearance between furniture and plugs, adapters, and other electrical connections.
Do not push furniture tightly against a plug if it places pressure on the cord or outlet. Similarly, avoid fastening extension cords to walls or routing them through building structures to disguise a poor outlet location.
If the wall outlet is too far away for the equipment's intended installation, a qualified electrician may need to provide a more suitable permanent solution.
How to Organize Router and Ethernet Cables in a Home Office
Networking equipment often creates a separate cluster of Ethernet, power, and internet-service cables. Organizing these connections helps keep the workspace manageable while reducing the chance of accidentally disconnecting the wrong device.
The first step is to identify the router, modem, and any additional networking equipment. Some homes use a combined modem-router unit, while others have several separate devices.
Should Ethernet Cables Be Kept Away From Power Cords?
Ethernet cables can generally be routed alongside other desk connections when installed appropriately, but avoiding unnecessarily long parallel runs beside mains power wiring is sensible. Cable construction, shielding, and the installation environment influence susceptibility to interference.
Do not tightly compress networking and power cords into a bundle that makes inspection or maintenance difficult.
A short label near each Ethernet connector can identify the router, computer, or network switch. This is especially useful when several similar cables connect to the same device.
Where Should a Wi-Fi Router Sit on a Desk?
A router should have adequate ventilation and a position that provides useful wireless coverage. Hiding it in an enclosed cable box or behind dense metal objects may affect cooling or wireless performance.
A small shelf or another suitable location near the workspace can keep networking equipment accessible without placing it in the middle of the desk.
If internet access stops working after rearranging the cables, check the router's power and network connections before resetting anything. The guide to fixing Wi-Fi connected but no internet explains how to distinguish connection problems from device settings and service outages.
The goal is to organize home office cables without disrupting the network that the entire workspace depends on.
Common Cable Management Mistakes That Make a Desk Messy Again
Home office cable organization often fails because the arrangement prioritizes appearance over accessibility. A desk may look perfect immediately after cleaning, but difficult-to-reach connections quickly lead to new loose cables.
Avoiding a few predictable mistakes makes the results last longer.
7 Desk Cable Management Mistakes to Avoid
An effective arrangement should remain safe and useful when equipment moves, chargers are unplugged, or new accessories are added.
Watch for these common problems:
- Hiding Cables Before Identifying Them. Unlabeled connections become difficult to troubleshoot when something stops working.
- Using Too Many Permanent Fasteners. Tight or irreversible bundles make routine equipment changes unnecessarily difficult.
- Leaving No Slack. Monitor arms, laptops, and adjustable desks need enough cable length for normal movement.
- Covering Warm Power Equipment. Overcrowded compartments can restrict ventilation around adapters and power strips.
- Leaving Cables Near Chair Wheels. Rolling furniture can damage cords and pull connectors loose.
- Keeping Every Old Cable Connected. Unused accessories increase clutter without serving a practical purpose.
- Making Daily Charging Inconvenient. Inaccessible phone and laptop leads quickly end up loose on the desktop again.
These mistakes are easier to prevent during the initial cleanup than to correct after everything has been secured.
A well-organized desk should make cables easier to identify, disconnect, and replace, not just harder to see.
Why Do Cable Organizers Keep Falling Off?
Adhesive clips often fail because they are attached to unsuitable surfaces, carry too much weight, or have not been installed according to their instructions. Heat, dust, and certain surface finishes can also affect adhesion.
Use clips rated for the intended cable weight and surface. Clean and prepare the attachment area as directed, then allow the recommended bonding time before loading the clip.
Do not depend on ordinary adhesive clips to support heavy electrical equipment. A clamp or mounting accessory specifically approved for the device is more appropriate.
Can Tight Cable Bundles Cause Problems?
Yes. Excessively tight bundles can strain connectors, damage insulation, and make cables difficult to inspect. Power cords and adapters also need appropriate ventilation.
Avoid sharp bends and tightly coiled arrangements, particularly where significant electrical loads or heat are involved.
When securing data cables, use enough tension to guide them without crushing them. The purpose of a cable organizer is to control the route, not compress the cables as tightly as possible.
How Much Does It Cost to Organize Home Office Cables?
Organizing home office cables can cost nothing when existing cables are simply sorted and repositioned. More elaborate setups may require reusable ties, clips, cable trays, or suitable mounting accessories.
The most economical approach is to improve the layout first and purchase only the items needed to solve specific problems.
Which Cable Management Upgrades Are Worth Paying For?
Different workstations benefit from different levels of cable organization. A basic laptop desk may need only clips and ties, while a large workstation can justify a tray or compatible docking station.
| Setup level | Typical approach | Best suited for |
| No-spend cleanup | Sorting, rerouting, and existing reusable supplies | Minimal desks and temporary workspaces |
| Basic organization | Reusable ties, clips, and labels | Laptops and single-monitor desks |
| Moderate upgrade | Suitable cable tray, sleeves, and routing accessories | Dual-monitor or desktop workstations |
| Advanced setup | Compatible docking station or standing desk cable spine | Frequently connected laptops and adjustable desks |
This comparison describes possible equipment choices rather than fixed retail prices. Costs vary by country, product quality, desk construction, and the accessories already available.
For most small home offices, a basic arrangement offers substantial practical improvement without requiring expensive hardware.
How to Keep Home Office Cables Organized All Year
The easiest way to maintain home office cable organization is to make small adjustments whenever equipment changes. A well-planned setup should not require a full rebuild every few months.
A short maintenance routine helps keep the arrangement functional and makes developing problems easier to notice.
The 2-Minute Weekly Cable Check
Once a week, inspect frequently used charging cables, check that loose connectors are not hanging into walkways, and return portable accessories to their normal locations.
This takes little effort when every cable already has an established route.
A useful weekly check includes:
- Returning charging cables to their clips.
- Removing unused temporary connections.
- Checking that chair wheels cannot reach loose cords.
- Looking for pinched, stretched, or visibly damaged cables.
- Making sure power equipment remains uncovered and ventilated.
The purpose is not to make the desk look perfectly staged. It is to prevent ordinary daily use from creating another cable tangle.
The 10-Minute Monthly Cable Reset
A monthly check can focus on less visible areas, including the underside of the desk and permanent equipment connections. Inspect cable organizers, labels, power adapters, and any equipment added during the previous month.
Replace damaged accessories and correct routing problems before they become difficult to manage.
Photographing the completed setup can also help when a device needs replacement or the desk is moved to another room.
Should You Reorganize Cables After Buying New Equipment?
Yes, whenever a new device changes the number or position of the connections. Adding a monitor, gaming console, docking station, or charging accessory may require a different route or additional electrical capacity.
CES 2027 takes place January 6–9, bringing another round of consumer technology announcements. New accessories may be appealing, but an existing workstation does not need a complete replacement simply because newer docking or charging products become available.
Rearrange the connections around equipment that is actually used, rather than redesigning the desk for accessories that may never be needed.
Final 30-Minute Home Office Cable Organization Checklist
A cleaner workspace is easiest to maintain when the organization system remains simple. Before finishing, check that the cables are secure, necessary connections remain accessible, and nothing is being stretched or overheated.
Use this checklist after the initial cleanup:
- All cables have been identified.
- Unused cords have been disconnected and stored separately.
- Power equipment has a safe, ventilated location.
- No power strips are connected in a daisy chain.
- Cables are protected from chair wheels and moving desk parts.
- Permanent data and display connections follow clear routes.
- Frequently used charging cables are easy to reach.
- Reusable ties and clips are not overtightened.
- Movable monitors and standing desks have sufficient cable slack.
- All required equipment has been reconnected and tested.
- Cable labels identify connections likely to need changing.
- The setup can be cleaned and maintained without major disassembly.
The best approach to organizing cables in a home office is not to hide every wire at any cost. It is to create a workspace where cords have a purpose, follow predictable routes, and remain safe during everyday use.
Thirty minutes can be enough to turn a tangled desk into a more comfortable, manageable workstation. A few reversible changes and regular checks can help keep it organized throughout 2027.
FAQ About How to Organize Cables in a Home Office
Start by identifying active cables, removing unused cords, and routing permanent connections along suitable protected paths behind or beneath the desk. Reusable ties and clips help control loose cables without making future changes difficult.
Use removable cable clips, reusable hook-and-loop ties, and compatible clamp-on desk accessories. These methods can work well for renters, although adhesive products must be suitable for the furniture surface and intended cable weight.
Choose a protected route that keeps cables away from chair wheels, feet, and moving parts. An appropriately installed cable tray or compatible clips can help organize suitable connections, but power equipment must remain accessible and adequately ventilated.
It can be safe when the power strip is installed according to its manufacturer's instructions and supported by suitable mounting hardware. Avoid enclosed spaces, overloaded outlets, damaged cords, and mounting methods that interfere with ventilation.
Yes. Reusable hook-and-loop ties are practical for managing lightweight cable groups because they can be opened and adjusted. Avoid excessive tightening and do not compress power cords into tightly packed bundles.
A compatible cable management spine or another manufacturer-approved system can help guide cables through the desk's movement range. The arrangement must be tested at both its lowest and highest positions to prevent pulling and pinching.
Position the monitors first, then route each display's video and power connections along the stand, arm, or another suitable protected path. Label the connections and leave enough slack for normal monitor adjustment.
Yes. Removing unused cords, repositioning equipment, and organizing existing cables by destination can significantly reduce clutter. Existing reusable ties and suitable labels may be enough for a small workstation.
Only when the box and electrical equipment are suitable for that arrangement and adequate ventilation is maintained. A tightly enclosed box can trap heat around power adapters, making an accessible and ventilated location preferable.
Use a suitable lightweight cable clip near the normal charging location. It keeps the connector accessible after the device is unplugged, while allowing the remaining cable to follow a protected route.
A brief weekly check and a more thorough monthly inspection are practical starting points. Review the arrangement whenever new equipment is installed, the desk is moved, or cable damage and connection problems appear.
The biggest mistake is hiding cables without considering safety, accessibility, and movement. A tidy-looking setup can still be inconvenient or unsafe if power equipment overheats, connections are inaccessible, or cables are stretched during normal use.